

LandCruiser overland build: our choices for Donkey
When we picked up Donkey in 2024, he was already pretty well equipped. Our Toyota Land Cruiser 79 Series had a rooftop tent, a canopy, a water tank and a small electrical system. That setup allowed us to spend four or five weeks travelling through Namibia, Botswana or Zambia, with plenty of wild camping. For a long holiday, it worked well.
When we decided to travel for several years, we started looking at the vehicle differently. We could have left with what we had, but we wanted a bit more comfort. One thing was clear: we wanted to be able to sit inside. Even when it was cold, raining or blowing a gale.
That became the starting point for Donkey’s conversion. In this article, we look back at our choices and our experiences during the first ten months of travelling. We also cover the changes we made later and our first experiences in Uruguay.
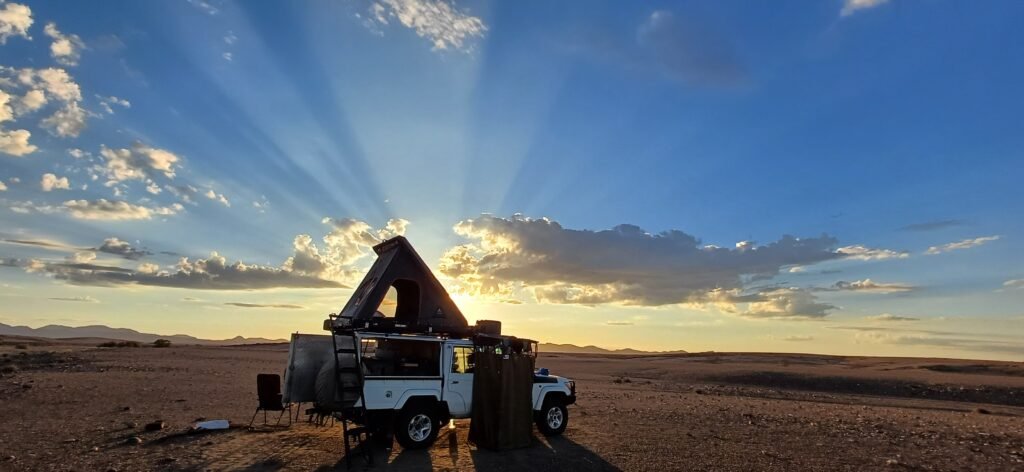
First, we worked out how we wanted to live
Before choosing components, we wrote down how we wanted to use Donkey. Miranda is great at putting documents together, so we had all our requirements neatly on paper.
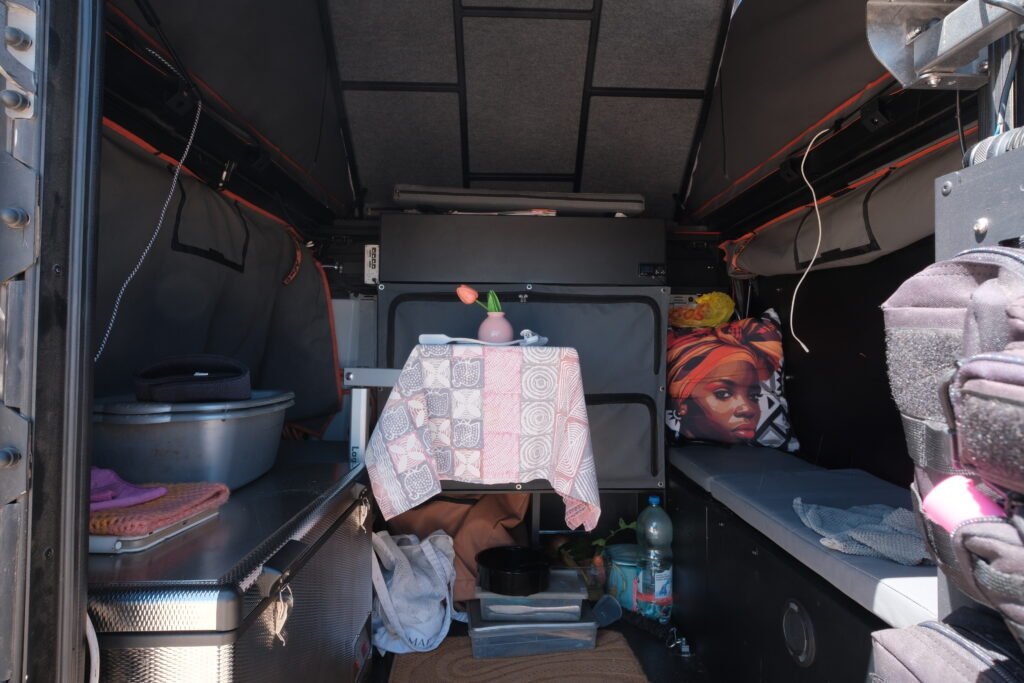
The canopy would become our living space: somewhere to sit, sleep, cook and store our things. The seating needed to be comfortable enough to spend a few hours there. For us, that also meant having heating.
The rear seats in our double cab could go. We could make better use of that space for storage and the electrical installation. We specifically wanted the lithium battery and its associated equipment in the cab, separate from the canopy.
We also wanted a filtered water system, solar panels and enough battery capacity to rely on shore power as little as possible. Having 230V power on board was on the list too, for things like the kettle and our laptops.
We watched plenty of YouTube videos and tried to learn from other overlanders. But we still had to keep our own way of travelling in mind. A layout that looks useful in someone else’s vehicle won’t necessarily work for us.
Why we chose R&D Offroad
With our requirements written down, we started looking for a conversion company. Our first choice was a company in Windhoek, as we’d had good experiences with them before. But they couldn’t build the interior we wanted. We also had quite a few discussions with a company in Swakopmund, but never received a quote.
That brought us to R&D Offroad in Cape Town. The reviews we’d read were positive, and they responded quickly. What mattered most to us was that they helped us think through our ideas and how to put them into practice.
Before work started, we’d made the main decisions, received a quote and approved it. Friends from Windhoek drove Donkey to Cape Town. He arrived on 1 October, and the conversion began. We flew to Cape Town on 8 October. By the time we arrived, the canopy was already fitted.
Around six weeks had been planned for the whole process. We came up with a few more ideas during the build, including a small fridge inside. That was fitted during the initial conversion too, along with the overhead console, LED headlights and diesel heater.
The layout: somewhere to sit inside and a place for everything
We chose an Alu-Cab Canopy Camper. We looked at other models too, but with some of them we couldn’t create a proper seating area. That indoor space was what made the difference for us.
We also immediately liked the kitchen on the rear door. Plates, glasses and cooking equipment could all be stored together, within reach when cooking. We chose a 60-litre fridge as well. This is separate from the small indoor fridge added during the build. We don’t use the freezer compartment in the 60-litre fridge much, but we appreciate the fridge space.
Two cupboards in the canopy provided storage for our clothes. We use the space above the seating area for things we need less often, such as winter jackets and other cold-weather clothing. Where the rear seats used to be, we added storage alongside the electrical installation.
There was also room to make better use of the space around the front seats. The Land Cruiser’s standard interior is pretty basic. An overhead console and extra storage around the centre console and gear lever helped us use that space more efficiently.
Very little of the original setup remained. We’d already had the suspension modified, so we kept that. We sold the old awning and replaced it with a new one, as it made little difference to the overall conversion cost. Apart from that, Donkey was largely fitted out from scratch.
Water, power and extra fuel
For the electrical system, we chose Victron equipment, solar panels and, initially, a 100Ah lithium battery. That was sized for our power use at the time: the kettle, laptops, phones, lights and so on.
The fixed water tank holds 50 litres. We also had a filtration system fitted, with two mechanical filters followed by a UV lamp.
An extra 80-litre fuel tank was fitted underneath the vehicle. Together with the original 130-litre tank, that gives us a total diesel capacity of 210 litres. The exhaust also had to be modified to make room for the extra tank.
Heating for cold days
The diesel heater was fitted during the initial conversion. We wanted to travel through different climates with Donkey, and we didn’t fancy having to crawl into bed whenever it got cold.
Three days of testing during the build
During the conversion, we were able to test Donkey for three days. That was useful because it gave us a chance to have things adjusted before the build was completely finished.
We added extra power sockets, among other things. We also wanted another light by the rear seating area. You only realise how useful that is when you need to get something out of storage in the evening.
A layout can look perfectly sensible on paper. Using the vehicle shows you what’s missing. Those three days helped us sort out the final details. After that, the setup had to prove itself on the road.
What works well in everyday use
Looking back at the first ten months, what we appreciate most is how easy the setup is to use. We want to be able to stop without unloading half the vehicle first.
At a campsite, we can open up the sleeping area, put out the awning and get the table and chairs out within a few minutes. If we stop for coffee on the road, we also want to be able to sit down and switch on the kettle without much fuss. When you do these things over and over again, a practical layout matters.
We use the rear-door kitchen every day. Everything is together, and we’d choose it again. The same goes for the clothes cupboards and overhead console. The storage above the seating area has been particularly useful for things we don’t need every day.
Having a fixed place for everything helps enormously. We use small bags for cables, chargers, electrical bits and things we want to grab quickly if there’s a problem with the vehicle. Otherwise, it soon becomes a mess. It only works if we put things back afterwards, though.
Our water supply served us well during the first ten months. We never ran out or had to ration it. We did a lot of wild camping, but we also stayed at campsites regularly. That’s part of the picture: we weren’t spending weeks at a time completely self-sufficient throughout that period.
Staying warm on cold days
The diesel heater turned out to be a good choice. It kept us nice and warm during our first cold evenings in southern Africa. And during our first weeks in Uruguay, when daytime temperatures didn’t rise above 10°C, we were warm inside.
We’re really happy with the heating. Being able to sit inside is useful, but on days like those, the heater is what makes that space comfortable.
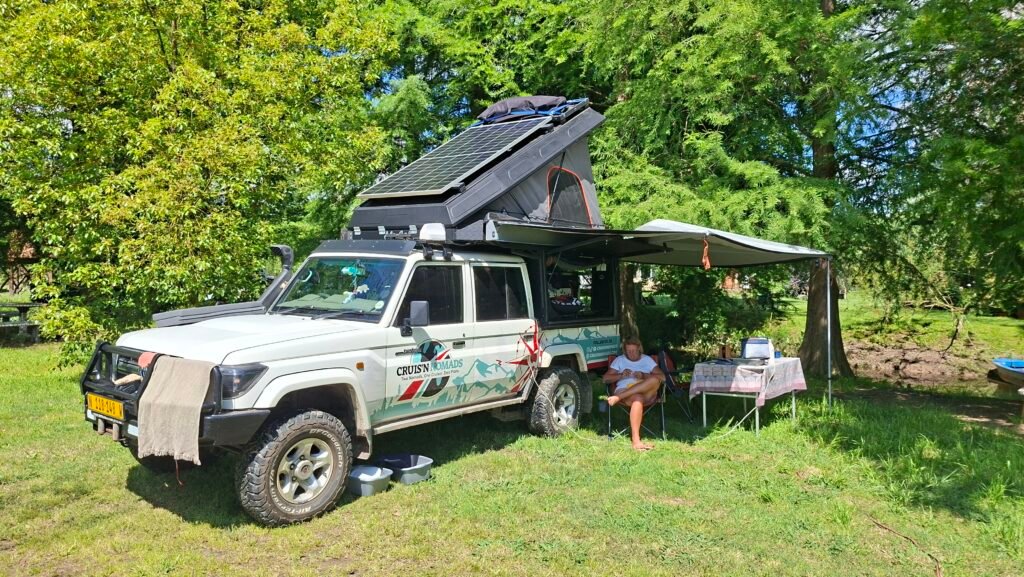
What disappointed us and what we changed
Not everything worked as we’d hoped. Some changes came about because of problems. Others came from realising on the road that our needs had changed.
Cracks in the Canopy Camper
After about two months, cracks appeared in the original Alu-Cab Canopy Camper. That was a major disappointment. We liked how practical the layout was, but the structural problems are just as much a part of our story.
The Canopy Camper has since been replaced with an Alu-Cab ModCAP Camper. We’ll find out over the coming years how it holds up in the long term.
We cover the cracks and how the situation was handled in more detail in our Alu-Cab review. Our experiences with the conversion company are covered in a separate review.
Our experience with the Alu-Cab Canopy Camper → Alu-Cab review
More battery capacity and charging from 120V
The original 100Ah battery was enough until we added Starlink. We left Starlink running 24 hours a day, drawing around 20 to 25 watts. On cloudy days in particular, we noticed that we no longer had enough battery capacity. We ran out of power once.
So we doubled the capacity to 200Ah. Since that upgrade, we haven’t had the same problem again.
Later, we also had an additional inverter/charger fitted so we could charge the leisure battery from a 120V shore power supply. This was added for places in South, Central and North America where we might come across a 120V connection. It means we can use shore power there to top up the battery too.
An extra water filter for remote areas
We’ve since bought a LifeSaver as well. We expect to spend longer periods away from towns and villages in South America. This gives us the option of filtering river water without putting it into our fixed water system. Whether we’ll use it often remains to be seen.
Less body roll with a sway bar
In South Africa, we had a sway bar fitted to reduce Donkey’s body roll. It makes a real difference. The vehicle handles much better and feels noticeably more stable.
It’s one of those modifications you notice as soon as you drive.
Softer cushions and different camping chairs
The seat cushions turned out to be too firm. We noticed there was room for improvement, especially when we spent two or three hours sitting inside in cold weather. So we had the filling changed.
We also replaced our Front Runner folding chairs. They were compact and easy to store. We’d even had a dedicated storage space made for them in one of the canopy’s side doors.
They worked well in warm weather. But when it was cold, the largely open backrests left our backs cold. Our fronts would warm up by the campfire while our lower backs stayed cold. Eventually, we bought different chairs.
Less stuff and one spare wheel
Travelling also showed us what we weren’t using. The Porta Potti went, along with a cast-iron pot that mostly took up space and added weight.
We also went from two spare wheels to one. The extra wheel was originally stored in the back of the vehicle, where it took up a lot of room. The remaining spare is mounted on the rear door.
We’ve been travelling since 2008, and in all those years we’ve never had two flat tyres at the same time. We also carry a tyre repair kit. For us, it was a trade-off that freed up space and reduced weight.
What we’d choose differently with hindsight
We’re less certain about the extra fuel tank than we were before. During the first ten months, we only really needed it once: on our trip to the Marienfluss and Hartmann Valley in northern Namibia. We returned with around 20 litres left in the fuel system.
That extra capacity also adds weight, and fitting the tank meant modifying the exhaust. If we were choosing again based on those first ten months, we’d probably leave it out. But we still have plenty of travelling ahead of us. It might prove very useful on a later part of the route.
We might consider a fully bespoke interior if money were no object. But we didn’t feel the costs involved were worth it. Our current setup is a good middle ground for us: a vehicle we can travel and live in for a long time, without choosing the most expensive option for everything.
Would we build Donkey this way again?
For the most part, yes. We’d choose the kitchen, storage, fridge and indoor seating again. The idea of a pop-top canopy camper also suits us well, despite the problems with our original Canopy Camper. The heater has more than proved its worth on cold days.
We would look even more critically at what we really need and how much weight each choice adds. An extra tank, a second spare wheel or a pot you hardly ever use: you carry all of it, every single kilometre.
When choosing a conversion company, we still think it matters that they help you think things through and have experience with this type of vehicle. That helped us with the layout and with ideas that came up during the build. But stay involved yourself. If you don’t have much technical knowledge, ask someone who does to take a look at what’s being built.
The main question is still how you want to travel. For us, a warm place to sit inside, a kitchen that’s ready to use and easy access to our things make the daily difference. We knew some of that before we left. We discovered what was missing on the road.
Frequently asked questions about Donkey’s camper conversion
Did the camper conversion need an inspection?
No, Donkey’s conversion did not require an inspection in Namibia, where the vehicle is registered.
Are the conversion and the fitted equipment insured?
No, our camper conversion and the fitted equipment are not insured.
How well does the camper keep dust out on unpaved roads?
Surprisingly well. We’ve driven plenty of unpaved roads, yet hardly any dust gets inside the canopy. We’re quite surprised by that ourselves.
Does the camper stay dry inside during heavy rain?
Yes. We had plenty of rain during the rainy season in East Africa, but the interior stayed dry. We haven’t had any problems with condensation either. We also had an anti-mould layer fitted underneath the mattress.
How do you keep the camper ventilated on cold nights?
Even on cold nights, we always leave one of the tent windows partly open. That provides the ventilation we need.
Can you use the sleeping area and seating area at the same time?
Yes, both areas can be used at the same time. To sit comfortably downstairs, though, we need to push the bed up. The bedding can stay in place, so there’s no need to strip the bed and make it again each time.
Can you cook when it’s windy or raining?
We normally cook outside. Very strong wind and heavy rain would make that difficult, but we haven’t faced that situation so far. We’ve since bought a multicooker, which also allows us to cook electrically inside the camper.
Can you repair the interior yourselves while travelling?
That depends on what breaks and how serious the damage is. We can handle small repairs ourselves. Duct tape and cable ties go a long way.